What are Picons?
Picons are channel logos which are linked to one or more TV channels using a service reference or a simplified version of the channel name. They can be installed on the popular Enigma2 satellite receivers, some TV backends for Kodi also support picons. Multiple versions and resolutions are available on the downloads page, which one you need depends on personal preference, used skin or used system/backend.
Kodi is able to display these channel logos on the electronic programme guide, allowing for quick visual identification of the channel. It is possible to manually download and set each of the images within Kodi, however, if you’re using TVHeadend as a back end server then you can use Picons to quickly set them in bulk.
A number of pre-generated icon packs are available on the downloads section of the website in both SRP (Service Reference Picon) format, SNP (Service Name Picon) format, and an IPK file typically used on Dreambox satellite receivers.
Whilst these pre-made packs can get you up and running quickly, you will more than likely discover that a number of images are missing, but with a little bit of patience you can build your own icons using the GitHub repository GitLAb repository GitHub repository and make sure that you have a full complement.
Building Your Own Picons
This guide will assume that you’ve already got TVHeadend installed, you’ve configured your tuner(s) and added the available channels.
Download (or clone if you’re comfortable using git) the files from the repository to somewhere easily accessible. You’ll notice that there are four folders and two shell scripts.
build-input
Initially the build-input folder will be empty, so you’ll need to create a couple of files which configure the scripts.
The first file to create tells the script where to look for the information about which channels are available in TVHeadend. The easiest and quickest method of getting this information is to query the TVHeadend API. To do this create a new file in the build-input folder called tvheadend.serverconf.
The contents of the file should contain the following, customised for your own setup:
# hostname or ip address of tvheadend server (default: "localhost")
TVH_HOST="localhost"
# port of tvheadend API (default: 9981)
TVH_PORT="9981"
# tvheadend user name
TVH_USER="jamie"
# tvheadend password of above user
TVH_PASS=""
The next file will tell the script what the icons should look like. This file needs to be called backgrounds.conf. Again copy and paste the contents from the below example and un-comment the lines by removing the
#
.
###########################################################
### Remove or comment the lines you don't want to build ###
###########################################################
#70x53;62x45;dark;blue
#70x53;62x45;dark;reflection
#70x53;62x45;dark;transparent
#70x53;62x45;dark;white
#70x53;62x45;light;black
#70x53;62x45;light;transparent
#100x60;86x46;dark;blue
#100x60;86x46;dark;reflection
#100x60;86x46;dark;transparent
#100x60;86x46;dark;white
#100x60;86x46;light;black
#100x60;86x46;light;transparent
#220x132;190x102;dark;blue
#220x132;190x102;dark;reflection
#220x132;190x102;dark;transparent
#220x132;220x132;dark;transparent
#220x132;190x102;dark;white
#220x132;190x102;light;black
#220x132;190x102;light;transparent
#220x132;220x132;light;transparent
#256x256;226x226;light;transparent
#256x256;226x226;dark;reflection
#256x256;226x226;light;grey
#400x170;370x140;dark;transparent
#400x240;370x210;dark;blue
#400x240;370x210;light;transparent
#400x240;400x240;light;transparent
#800x450;760x410;light;transparent
build-output
Once those two files have been created, the first of the two shell scripts can be run using the command
bash 1-build-servicelist.sh
$ bash 1-build-servicelist.sh
Log file located at: /tmp/tmp.VSm9O3K8sO.servicelist.log
Which style are you going to build?
1) Service Reference
2) Service Name
#?
We’re creating a Service Reference style list of channels, so press
1
and enter. This will then search through any available configurations and all being well should find your TVHeadend server-mode configuration file. This will query the TVHeadend API for channel information and start counting through the channels it finds.
Enigma2: /home/jamie/picons/build-input/enigma2 not found
TvHeadend (file-mode): /home/jamie/picons/build-input/tvheadend not found
TvHeadend (server-mode): Exported to /home/jamie/picons/build-output/servicelist-tvheadend-servermode-srp
VDR: /home/jamie/picons/build-input/channels.conf not found
The result will be a file called servicelist-tvheadend-servermode-srp in the build-output folder. This lists each of the channels’ service references, full names and a short name separated by the pipe character.
1_0_2_1841_1041_233A_EEEE0000_0_0_0     |  BBC Gloucestershire    |  1841_1041_233A_EEEE0000=--------
1_0_1_1100_1041_233A_EEEE0000_0_0_0     |  BBC NEWS               |  1100_1041_233A_EEEE0000=bbcnews
1_0_19_A000_A000_233A_EEEE0000_0_0_0    |  BBC NEWS HD            |  A000_A000_233A_EEEE0000=bbcnewshd
1_0_19_4484_4082_233A_EEEE0000_0_0_0    |  BBC ONE HD             |  4484_4082_233A_EEEE0000=bbconehd
If the short name for a channel is made up of just dashes, (such as BBC Gloucestershire in the above snippet), then the channel reference has not been recognised and subsequently the icon will not be generated. If the icon exists in the build-source\logos folder then it is possible to add an entry to the bottom of the build-source\srp-index file. Using the same example above, you could add the entry
1841_1041_233A_EEEE0000=bbcgloucestershireto the bottom of the file if there was a file called “bbcgloucestershire.default.png” in the logos folder. Now rerun the step 1 script and any changes should be updated.
When you’re happy with the list of channels it is time to run the second script to generate the Picons;
bash 2-build-picons.sh
.
$ bash 2-build-picons.sh
Log file located at: /tmp/tmp.cVWBKTq9Yh.picons.log
16:06:23 - No "svgconverter.conf" file found in "build-input", using default file!
Which style are you going to build?
1) Service Reference         3) Service Name
2) Service Reference (Full)  4) Service Name (Full)
#?
As above, we’re using Service Reference style list of channels and rather than generating thousands of unneeded icons we’re supplying a list, so press
1
and enter. The script will then go through and create the Picons.
16:07:54 - Version: 2017-04-10--16-07-54
16:07:54 - Checking index
16:07:56 - Checking logos
16:08:17 - Creating symlinks
16:08:17 -----------------------------------------------------------
-..on.17 - Creating picons: srp.
-..on.36 - Creating binary packages: srp.
16:09:39 -----------------------------------------------------------
-..on.39 - Creating picons: srp.
-..on.55 - Creating binary packages: srp.
16:09:59 -----------------------------------------------------------
-..on.59 - Creating picons: srp.
-..on.15 - Creating binary packages: srp.
16:10:18 -----------------------------------------------------------
16:10:18 - Creating picons: srp.220x132-220x132.light.on.transparent
16:18:03 - Creating binary packages: srp.220x132-220x132.light.on.transparent
16:18:12 -----------------------------------------------------------
-..on.12 - Creating picons: srp.
-..on.28 - Creating binary packages: srp.
16:18:31 -----------------------------------------------------------
-..on.31 - Creating picons: srp.
-..on.47 - Creating binary packages: srp.
16:18:51 -----------------------------------------------------------
-..on.51 - Creating picons: srp.
-..on.07 - Creating binary packages: srp.
16:19:10 -----------------------------------------------------------
-..on.10 - Creating picons: srp.
-..on.26 - Creating binary packages: srp.
16:19:30 - FINISHED!
Once completed, a new folder called binaries-srp will be generated in build-output folder and there will be 4 files in this folder, the one we’re interested in will be called something similar to: srp.220×132-220×132.light.on.transparent?_2017-04-10–16-07-54.hardlink.tar.xz, this will obviously change depending on what size and style icons you have chosen, and the date and time that you built them.
Add the Picons to TVHeadend
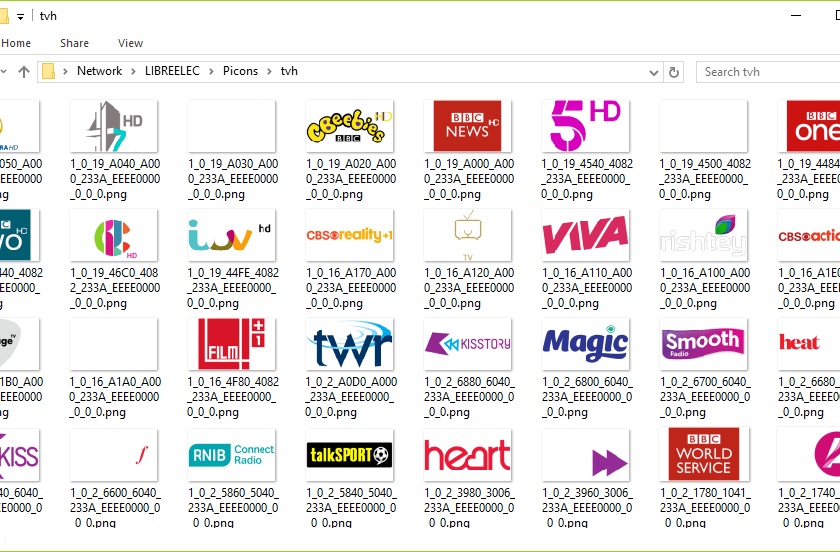
The archive needs to be extracted to a suitable folder on the TVHeadend server. On my particular install of LibreElec there is already a folder called Picons and within this there is a sub folder called TVH.
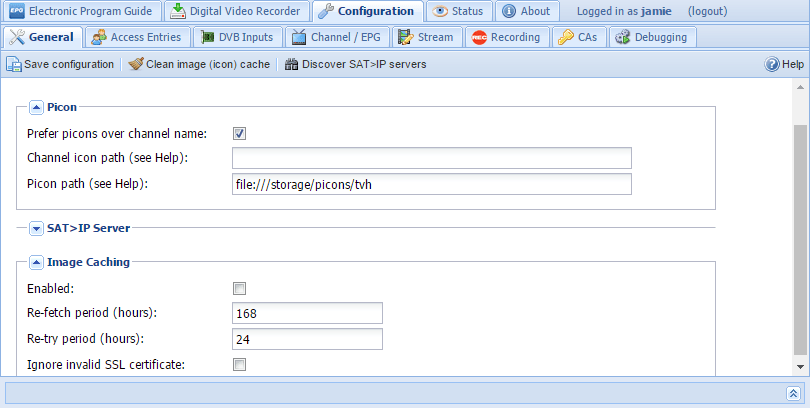
Open up the TVHeadend page using your browser and head to the Configuration -> General tab. Scroll down and find the Picon section and in the Picon path field enter the location that you extracted your icons into. Click the “Save configuration” button followed by the “Clean image (icon) cache” button at the top.
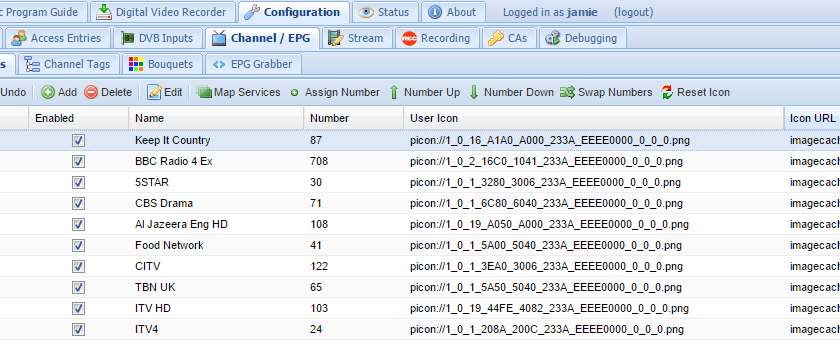
Finally on the Configuration -> Channel / EPG -> Channels tab make sure that all of the entries against “User Icon” are in the format “picon://[Service_Reference_String].png”. If they aren’t then highlight the channel and hit the “Reset Icon” button and this should revert it back to the expected format.
And that’s it! All being well you should have your icons appear automatically in the Programme information in TVHeadend and in Kodi’s EPG.